
NetworksHow-to guide
Change a network logo and banner
Update the network logo and banner from Settings → Branding. Nothing is public until you save.
Branding Verified Oct 6, 2026
Watch it step by step
Click the highlighted area to move through the task, or watch the video when one is available. Newer flows may use a labeled walkthrough instead of a live photo.
Network owner or admin 1 min 5 steps
Before you start: A square logo (PNG, JPG or WebP, up to 6 MB) and a wide banner photo · Do this first: Create and brand a network
Step 1 of 5
1. Open Settings
goodaction.com/dashboards/social/networks?suiteId=…&tab=settings
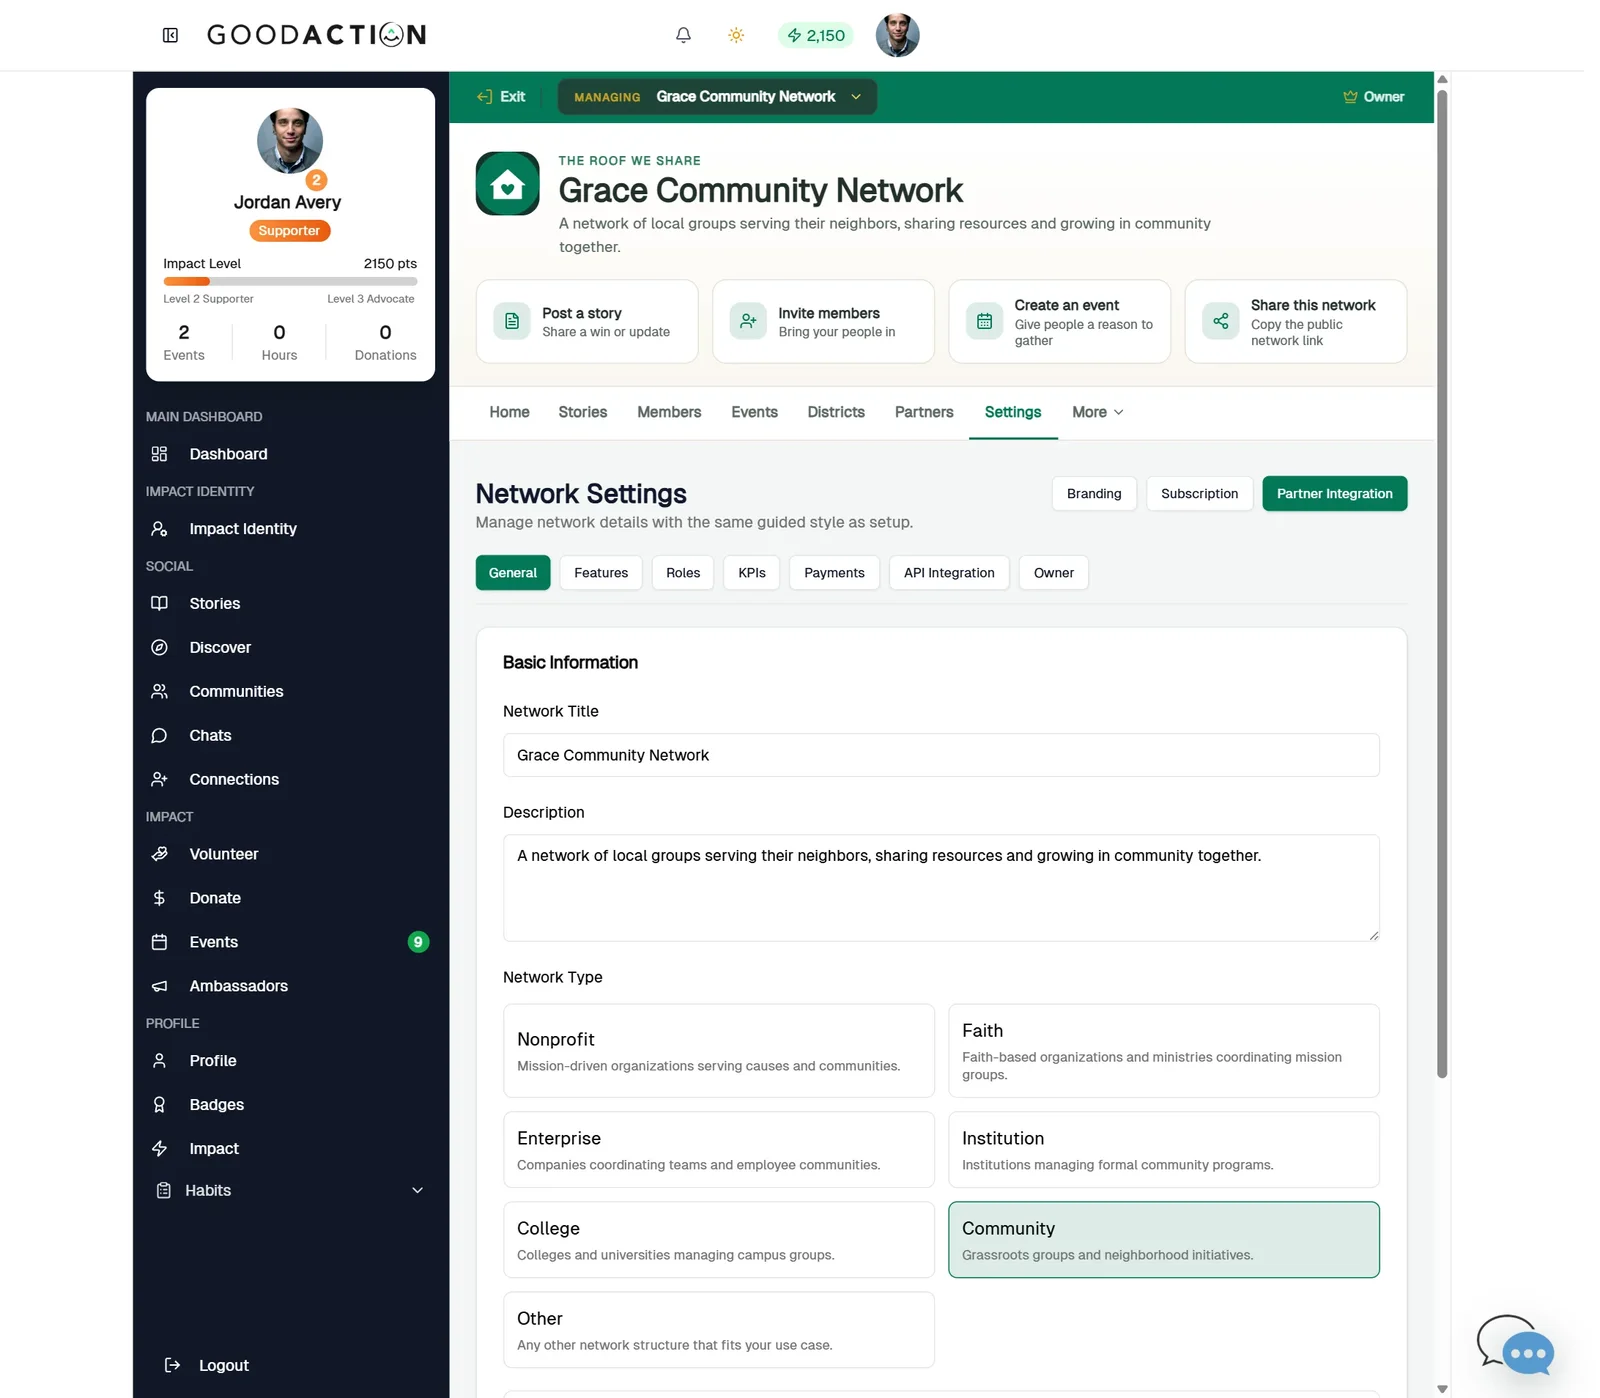
In your network workspace, open Settings and click Branding.
Click the highlighted area, or use ← →
Done when: Your new logo and banner show on the workspace header and on your public portal at goodaction.com/o/your-network.
Change a network logo and banner
Overview
Update the network logo and banner from Settings → Branding. Nothing is public until you save.
Where to find it
Open the network workspace → Settings → Branding.
How it works
- Open Settings and click Branding.
- Drop in a square logo (at least 512×512) and a wide banner (about 1600×600).
- Check Contact details, then click Save Branding Settings.
- Open your public portal at /o/your-network to confirm the new look.
If something does not look right
- Confirm the signed-in profile and current workspace.
- Capture the page address and the exact message you see.
- Ask GoodAction Support if the control is still missing.