
Configure the public donation page
Use Organization Settings to review the public donation page details and confirm the organization profile and payment account first.
Watch it step by step
Click the highlighted area to move through the task, or watch the video when one is available. Newer flows may use a labeled walkthrough instead of a live photo.
Step 1 of 4
1. Set your username
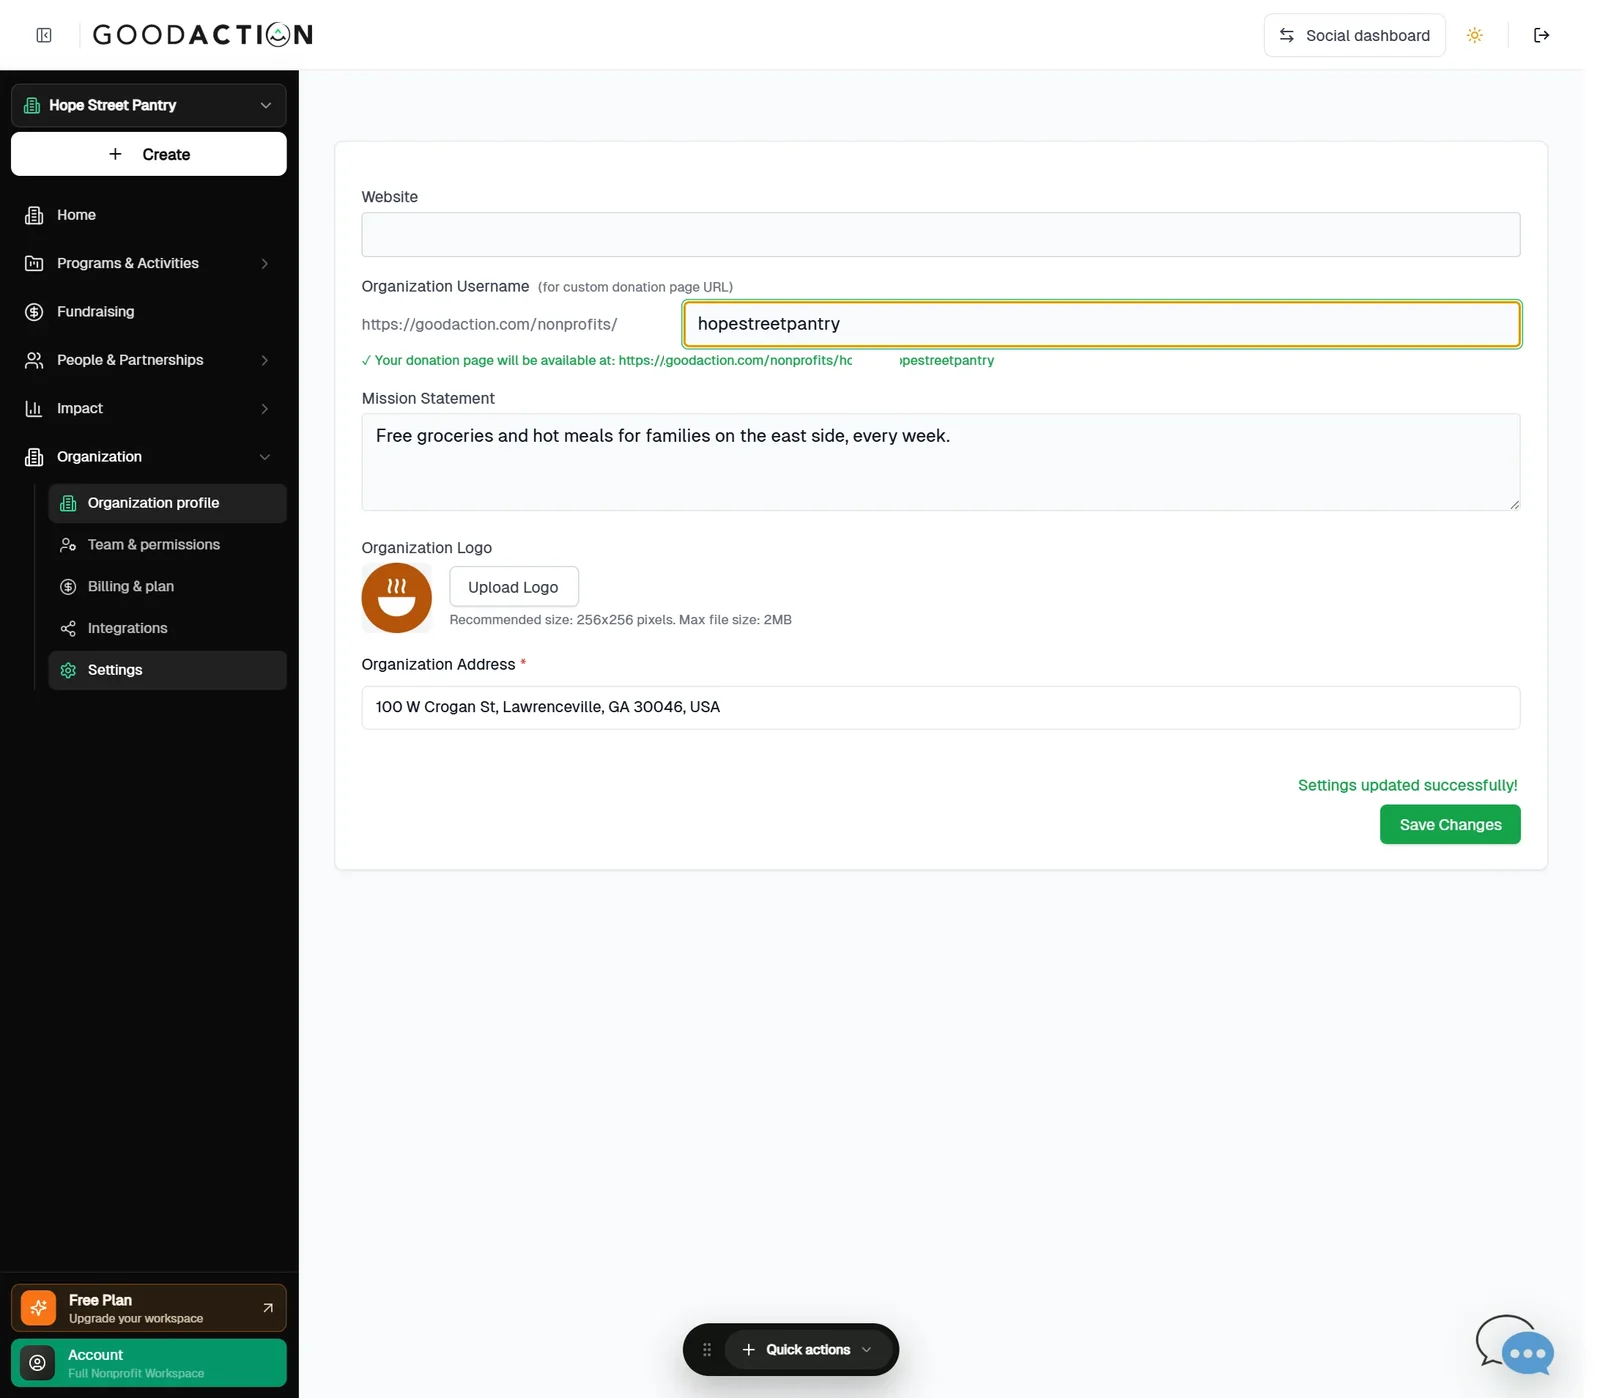
In Settings → Profile, set the Organization Username. It becomes your page address. Save Changes.
Done when: Your donation page is published at goodaction.com/nonprofits/your-username.
Configure the public donation page
Overview
Use Organization Settings to review the public donation page details and confirm the organization profile and payment account first.
Where to find it
Open the nonprofit workspace. Organization profile, Team, Invitations, Payments, Platform billing, API Integrations, Donation Page and Receipt Templates are available from Organization > Settings when your organization role permits them.
How it works
- Open the correct organization fundraiser, donor record or public giving page.
- Confirm campaign status, payment readiness, currency, dates and the amount being handled.
- Complete the action described above and review the donor-facing copy or checkout breakdown.
- Save or submit once, then verify the campaign, donation activity or receipt.
Important details
Fundraising and payouts become usable only after the organization payment requirements shown in the workspace are satisfied. Use truthful goals and descriptions. A donation is complete only after checkout confirmation; if the result is uncertain, check the receipt or activity before retrying.
If something does not look right
- Confirm the signed-in profile and current workspace shown in the page header.
- Capture the page address, time and exact visible error.
- Do not include passwords, API keys, bank details or full card data.
- Ask GoodAction Support when the expected control remains unavailable or the saved result differs from this article.